Pages

Monday, December 9, 2013

How to copy file between host using scp

How to copy file between host using scp

 What is Secure Copy?

scp(Secure copy) allows files to be copied to, from, or between different hosts. It uses ssh for data transfer and provides the same authentication and same level of security as ssh

Below are the example syntax of scp :

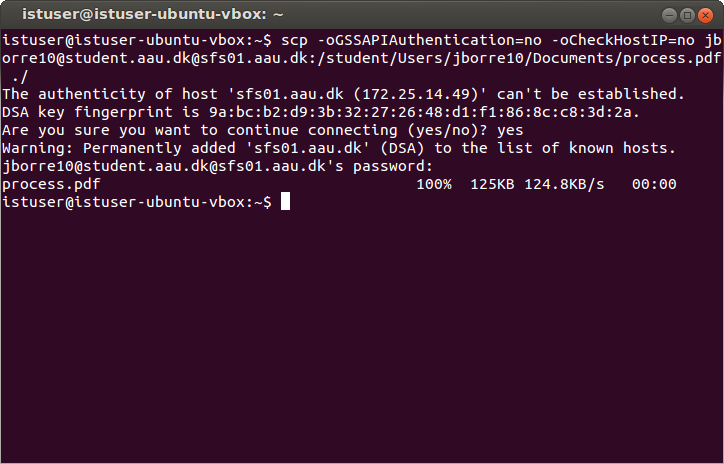
Copy the file "foobar.txt" from a remote host to the local host
$ scp your_username@remotehost.edu:foobar.txt /some/local/directory

Copy the file "foobar.txt" from the local host to a remote host
$ scp foobar.txt your_username@remotehost.edu:/some/remote/directory

Copy the directory "foo" from the local host to a remote host's directory "bar"
$ scp -r foo your_username@remotehost.edu:/some/remote/directory/bar

Copy the file "foobar.txt" from remote host "rh1.edu" to remote host "rh2.edu"
$ scp your_username@rh1.edu:/some/remote/directory/foobar.txt \ your_username@rh2.edu:/some/remote/directory/

Copy the files "foo.txt" and "bar.txt" from the local host to your home directory on the remote host
$ scp foo.txt bar.txt your_username@remotehost.edu:~

Copy the file "foobar.txt" from the local host to a remote host using port 2264
$ scp -P 2264 foobar.txt your_username@remotehost.edu:/some/remote/directory

Copy multiple files from the remote host to your current directory on the local host
$ scp your_username@remotehost.edu:/some/remote/directory/\{a,b,c\} .
$ scp your_username@remotehost.edu:~/\{foo.txt,bar.txt\} .

By default scp uses the Triple-DES cipher to encrypt the data being sent. Using the Blowfish cipher has been shown to increase speed. This can be done by using option -c blowfish in the command line.
$ scp -c blowfish some_file your_username@remotehost.edu:~

It is often suggested that the -C option for compression should also be used to increase speed. The effect of compression, however, will only significantly increase speed if your connection is very slow. Otherwise it may just be adding extra burden to the CPU. An example of using blowfish and compression:
$ scp -c blowfish -C local_file your_username@remotehost.edu:~

Sunday, December 8, 2013

How to X Forwarding with Putty

Unix machines have been able to run software on a remote machine and display the GUI locally. Linux and Mac OS X support X Forwarding with no extra software.
Any terminal on Linux should do X Forwarding.
For Mac users need to run "Applications > Utilities > XTerm". In a command line terminal run "ssh -Y user@server virtualbox" and you'll be running matlab on "server" but seeing it on your desktop. In this post we will discuss about How to X Forwarding with Putty.

Windows users need two pieces of software: an secure shell program (putty) to establish the remote connection and an X Server to handle the local display(xming). Click here to install putty and xming.

Below are the steps to configure putty:
  1. Add Unix hostname
  2. Switch Protocol to SSH
  3. Type name of session in saved sessions
  4. Click 'Save'
    putty: create session
  5. Expand the 'SSH' tab from the 'Category' list
  6. Choose 'X11' from 'SSH' list
  7. Check 'Enable X11 Forwarding'
    putty: enable x11 forwarding
  8. Choose 'Session' from 'Category' list
  9. Click 'Save'
Below are the steps configuring Xming :

Just run "All Programs > Xming Xming" and it should work if you've got PuTTY configured. 

Connectiong putty :
  1. Start Xming
  2. Start Putty
  3. Double click on the saved session that has been configured for X11 Forwarding
  4. After connect, run application that use GUI, for example: virtualbox

Saturday, December 7, 2013

How to configure vnc server on linux

How to configure vnc server on linux
 
This post will discuss about How to configure vnc server on linux completely. For this experiment, we will user rhel (redhat enterprise linux) 6.
Here are the steps to configure vnc server on rhel :
  1. Install tigervnc-server
    # yum install tigervnc-server
  2. Edit the "/etc/sysconfig/vncservers" file to configure the required displays. The following entries enable VNC for display numbers ":2" and ":3". Notice multiple "display:user" pairs are defined on a single line, but the arguments for each display are defined separately.
    VNCSERVERS="2:root 3:oracle"
    VNCSERVERARGS[2]="-geometry 1280x1024 -nolisten tcp -localhost"
    VNCSERVERARGS[3]="-geometry 1280x1024"
  3. Set the VNC password for any users defined in the "/etc/sysconfig/vncservers" file.
    # vncpasswd
    Password:
    Verify:
    #
    # su - oracle
    $ vncpasswd
    Password:
    Verify:
    $ exit
    logout
    # 
    
  4. Enable the "vncserver" service for autostart and start the service.
    # chkconfig vncserver on
    # service vncserver start
  5. If your firewall is on, you must add this code in /etc/sysconfig/iptables
    -A INPUT -m state --state NEW -m tcp -p tcp -m multiport --dports 5901:5903,6001:6003 -j ACCEPT
    
  6. You should now be able to use a VNC viewer to connect to system using the display numbers and passwords defined.
Once your VNC server is configured, you can connect to it from any VNC client. On Linux this will often be TigerVNC, installed using the following command.
# yum install tigervnc
To connect to a VNC server use the following command.
# vncviewer machine-name:port
# vncviewer maggie.localdomain:3
# vncviewer 192.168.0.4:3

Friday, December 6, 2013

How to reconfigure oracle dbconsole

How to reconfigure oracle dbconsole


If the IP address and/or hostname changes for a system running Oracle, we need to reconfigure oracle dbconsole correctly.
This post will discuss about  How to reconfigure oracle dbconsole :
  1. drop oracle dbconsole repository
    cd $ORACLE_HOME/bin ./emca -deconfig dbcontrol db -repos drop
  2. recreate oracle dbconsole repository
    ./emca -config dbcontrol db -repos create
  3. shutdown oracle database
    sqlplus sys@blabla as sysdba
    sql > shutdown immediate
  4. startup oracle database
    sql > startup
Don't Forget To Join Our Community
×
Widget